
GLOBAL DRONE X183 (X6 FOLLOWER) WiFi FPV GPS DRONE
Global Drone X183 (X6 Follower) WiFi FPV GPS Drone, $113.99
Manufactured by Global Drone (https://globalwintoys1.aliexpress.com...)
Last updated 01-15-19

This isn't a flashlight, household lamp, Christmas light set, or other thing that glows, but it *DOES* have a number of LEDs on its fuselage (this word is definitely *NOT* pronounced "fyoo SELL' uh jee" as Drake Parker from the TV program "Drake and Josh" would pronounce it; the word is pronounced " "
"  , so what the hey
I love things that fly; that's why I took the bate and also why I added a seperate section titled "PRODUCTS DESIGNED TO FLY" on my website back in mid-2006. I was also attracted to something that this drone has that many others don't...
- 1: It has GPS -- simply meaning that it can stably hover despite any mild wind and knows where 'Home' is.
- 2: It has a gyro -- that means it's easy to fly even for a "craptastic" pilot like me.
- 3: It has all of those wonderful LEDs
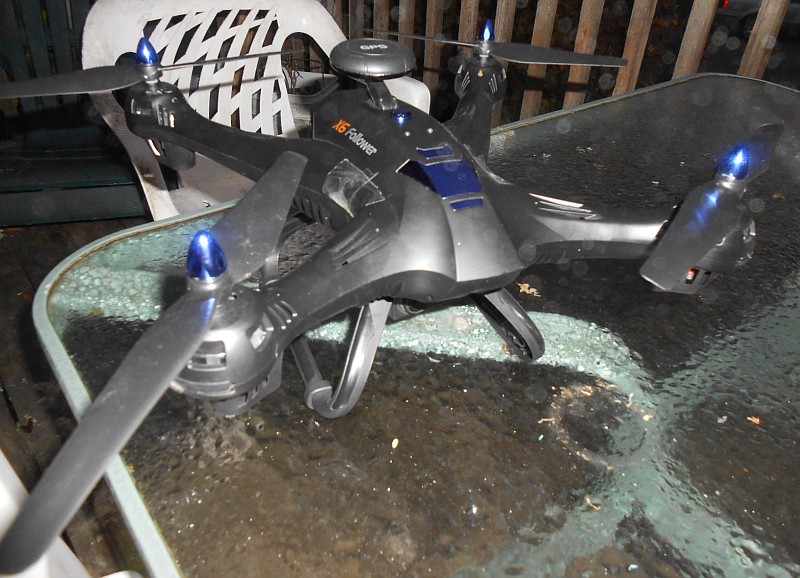
This is a large, fairly heavy (1.980kg; {~4.4 pounds}), easy-to-fly 4-channel, brushless motor* remote-controlled outdoor drone that has advanced features like GPS tracking, return to home, etc. Its remote uses RF radiation at 2.4GHz to communicate to and from the drone.
It sports a 720p camera; both still photos and aerial video can be taken with it!
You will however, need to procure your own MicroSD memory chip. This MicroSD chip probably needs to be a Class 10. If you use a memory chip that is rated lower than Class 10, you'll probably see skipped frames, "jitters", unwanted intermittent video artifacts, and similar horse puckey.
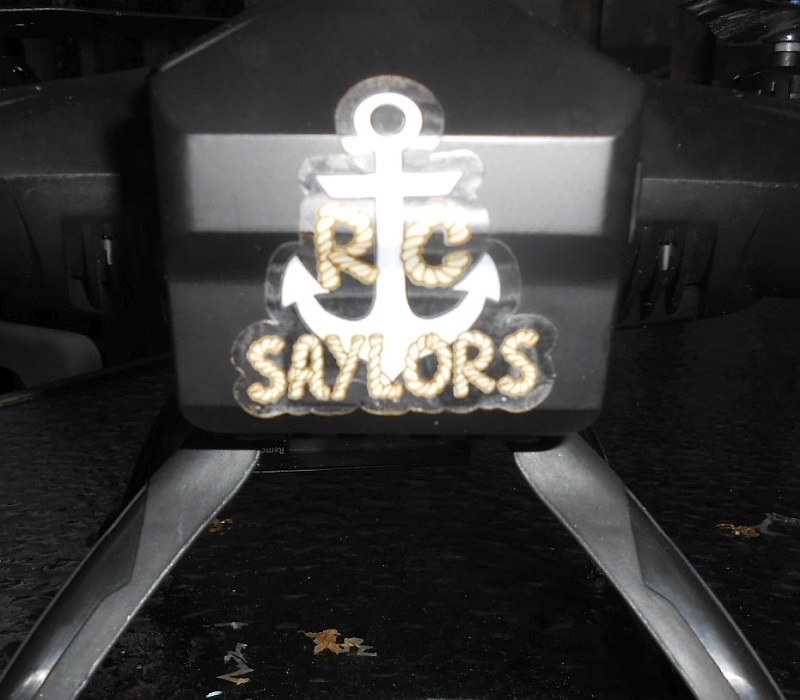
In the second photo above, you should also be quite easily be able to see a TheRCSaylors Sticker -- it was applied by me; please don't expect your Global Drone X183 to come with one.
 SIZE
SIZE

This toy is a bit more complicated to get it to take off than your average toy-grade drone...here's how to get it off the ground:
As with any rechargeable product, charge it first (see directly below), install the flight battery, and then you can pretend to fly a dragonfly (well, that's what the kitty cats would think it was if it were designed to be flown in a small living room -- WHICH IT IS NOT!!!)
1: Press & release the "POWER" button on the drone's upper surface. Place the drone on the ground.
2: On the remote control, slide the Power switch (located between and slightly below the two joysticks) upward toward the antenna to turn it on. BE QUICK ABOUT THIS!!! The radio has to be turned on within several seconds of the drone being powered up or else it'll never take off!!!
3: Wait until the lights on the drone stop flashing rapidly. When this has occurred, move the left joystick to the upper left and the right joystick to the lower right. The lights on the drone should start to flash very rapidly again. When they stop the rapid flashing, you may then allow the joysticks to return to center.
Now, move the left joystick to the lower right and the right joystick to the upper left. The lights on the drone should once again start to flash very rapidly. When they stop the constant rapid flashing and go to an intermittent rapid flashing, you may then allow the joysticks to return to center. But no, you aren't done here. Lift the drone slightly off the ground and rotate it clockwise exactly three times, then orient the drone so that the back (where the battery door is) faces up toward the sky, and rotate it clockwise exactly three times. This is geomagnetic calibration.
4: Wait for the lights on the drone to stop flashing and operate steadily.
5: Move both sticks on the radio down and toward the edges (out). The motors should spin up at a fairly low speed (this is idle speed; it lets you know that the drone is "armed" and ready to rockl!)
6: Give it a bit of throttle (move the left stick up toward the entenna). Congratulations, you're now a pilot!!!
For additional instructions & tips on how to fly, please read the instructional material that comes with the product.
Press & release the POWER button on the drone and slide the POWER switch on the radio downward (away from the antenna) to neutralise them when you are finished.

The battery in the Global Drone X183 Drone itself is rechargeable; however the batteries in the remote will need to be changed from time to time.
To do this, use the included Phillips screwdriver to unscrew & remove the small screw on the battery door. Set it aside. Swing the battery door up & off, carry it to the top of the basement stairs, and kick it down those stairs into the basement crawling with thousands of hungry termites that have to piddle -- they'll think it's something yummy to eat and start chewing on it, but quickly find it unpalatable, so they all pass micturition on it...O WAIT!!! YOU'LL NEED THAT!!! So just set it aside instead.
Remove the four used AA cells from the compartment, and dispose of or recycle them as you see fit.
Insert four new AA cells into the compartment, orienting each cell so its flat-end (-) negative faces a spring for it in each chamber.
Finally, swing the battery door back on and screw in that screw that you removed moments ago.
Aren't you glad you didn't kick that battery door down the stairs to all those hungry, hungry termites that really needed to go poddy now?
To charge the battery in the Global Drone X183 Drone, first remove the battery from the drone itself. Plug the larger end of the USB charge cable into any USB port on your Mac or pee-cee, and plug the battery into the small white connector at the other end of the cable.
When the charge cycle is in progress, the green LED on the charger will be flashing at approx. 1Hz (one blink per second). When the charge cycle is complete, this LED should turn steady-on.
You may then safely unplug the battery from the charger, and unplug the wired USB dongle from your computer.
Fully charging the Global Drone X183 Drone' battery should give you approx. 10 minutes of flying time.

This RC drone is meant to be used as a toy in a dry area outdoors, not as a flashlight meant to be carried around all the time, thrashed, trashed, and abused; so I won't throw it against the wall, stomp on it, try to drown it in the {vulgar slang term for a fudge bunny}bowl or the cistern, run over it, swing it against the concrete floor of a patio, bash it open to check it for candiosity, fire it from the cannońata (I guess I've been watching the TV program "Viva Pińata" too much again - candiosity is usually checked with a scanner-type device on a platform with a large readout, with a handheld wand that Langston Lickatoad uses, or with a pack-of-cards-sized device that Fergy Fudgehog uses; and the cannońata is only used to shoot pińatas to pińata parties away from picturesque Pińata Island), send it to the Daystrom Institute for additional analyses, or inflict upon it punishments that I might inflict upon a flashlight.
So this section of the drone's web page will be significantly more bare than this section of the web page on a page about a flashlight.
The range of the Tx (R/C hobby talk for "transmitter" aka "radio") is advertised as 400M (~1,312 feet); frequency is stated as 2.4GHz.
The unit has a 4-channel remote control; this allows for forward / backward / up / down / left / right movement (movement on all three axes -- X, Y, and Z). It also has a fully proportional control system; simply meaning that the motor speeds can be varied depending on how far you move the joysticks -- it isn't simply "full power and no power at all" like some other R/C products.
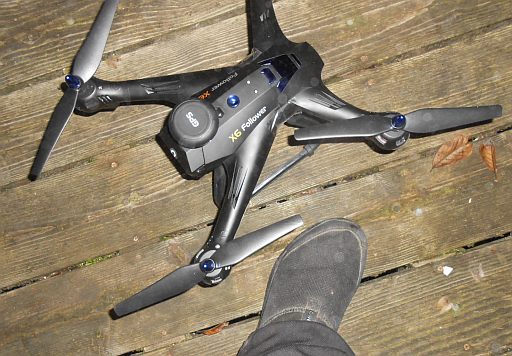
The camera has a video resolution of 1280 x 720 (720P video quality); however, the camera was found to be defective (it appears to be physically missing most of its 'guts') so I affixed my Fitfort 4K action cam to its undercarriage so that I could still shoot aerial video with the drone. As a result, videos that I make with this drone will be in 1080p.
Because the inbuilt camera is nonfunctional, I cannot make any use of its FPV capabilities or even offer up any comments (re: latency, frame-skipping, etc.) about it.
The radio feels a bit chintzy, but the majority of toy-grade drone transmitters feel like this.
However, I got caught with my pants down a bit here because the drone itself feels solid and sturdy.

Photograph of its remote control.


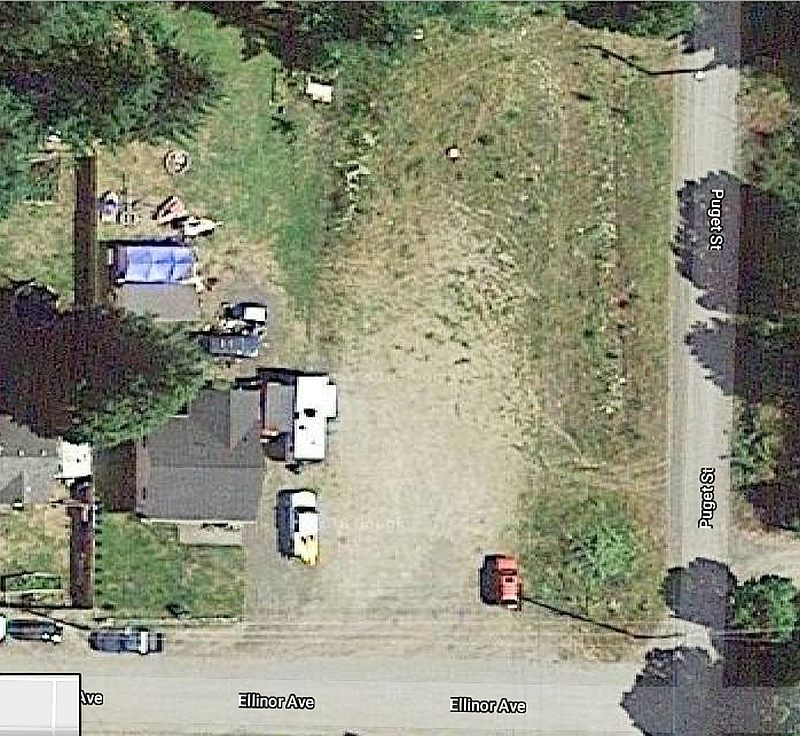
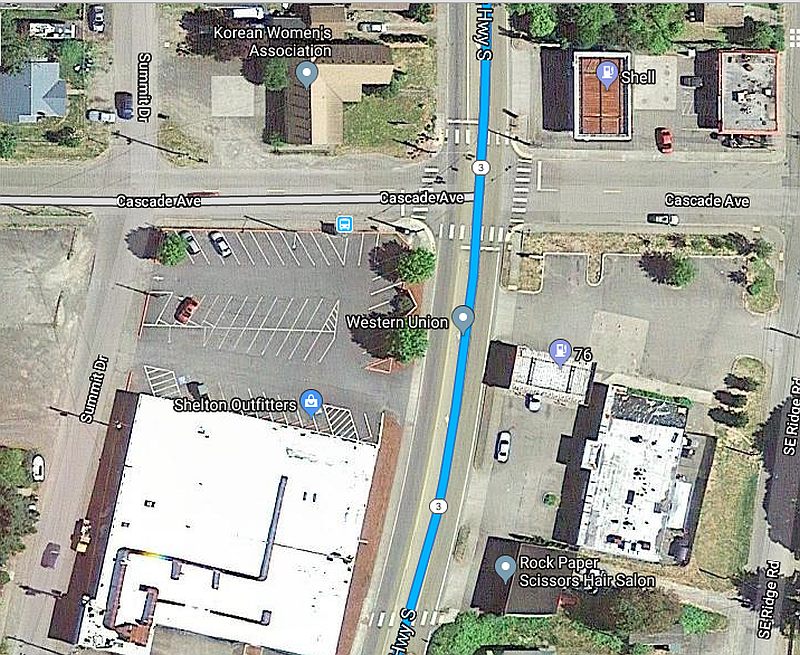


These are aerial photos of my flying "fields" here in Shelton that I can access via my electric wheelchair.

ALL OF THE FLIGHT VIDEOS ARE ON THEIR OWN WEB PAGE
SO THAT THIS EVAL. WOULD NOT BECOME TOO CUMBERSOME!!!
TEST NOTES:
Test unit was purchased on Ebay on10-05-18 and was received at 3:24pm PDT on 10-10-18.
The camera was found to be defective (it appears to be physically missing most of its 'guts') so I affixed my Fitfort 4K action cam to its undercarriage so that I could still shoot aerial video with the drone.
I took it up for its maiden voyage yesterday morning without any significant issues.
But when I went to fly it this afternoon, there was big trouble in little Edo {obscure Digimon reference here}.
The drone appears to successfully complete its prelaunch initialisation sequence, and pulling both joysticks on the radio down and outward starts all four motors in idle. But giving it throttle now does nothing! The drone stays on the ground at idle speed.
Almost immediately after power-on, all of the LEDs in the drone blink the following in unison (I believe it is a fault code):
Two brief flashes, pause for ~700ms, longer flash. Cycle repeats until the drone is powered down.
I ensured that the flight battery was fully charged (the radio's display indicated 8.4 volts) and I power-cycled the drone multiple times -- still no joy.
Because its maiden flight was also its final flight, the always-dreadful, "  " icon will have to be appended to its listings at once.
It's "BUCKING FUSTED" as they say.
UPDATE: 10-22-18
It's alive!!! 
After seeing a calibration video on YouTube and following it to the letter, the drone now flies!!! 
The instructions in this video appeared to the the same as in the manual so I honestly don't "get" it.  .
.
UPDATE: 10-23-18
The balance charger appears to have gone down the tube; I'm now trying another.
UPDATE: 10-27-18
Getting the calibration to "take" is a simple matter of timing: you need to be fairly quick -- any delays will cause the calibration to fail and the drone will flash the fault code on its LEDs (see the TEST NOTES above for this fault code).
The primary thing is to get that radio turned on straight away after the drone itself is powered up.
UPDATE: 11-02-18
I made my first flight with a 3S (3-cell) 11.10 volts flight battery yesterday in an effort to extend flight time from ~five minutes to closer to the advertised 10 minutes.
UPDATE: 11-02-18
Well, the verdict's in...it is NOT okay to use a 3S flight battery in this drone.
I made a flight with a 3S battery yesterday morning, and everything was kosher until almost exactly four (4) minutes into the flight, at which point a thermal cutout engaged (probably to protect the ESC from overheating) and shut all four motors down mid-flight while the drone was still 72 meters (~236 feet) in altitude.
Fortunately, the drone impacted the ground right-side up into soft, somewhat tall grass and the only damage was that the starboard (right) landing skid became busted. A piece of wide packing tape serves well as a temporary "fix" that allows the drone to launch and land normally. And the thermal cutout was
temporary; I took the drone for a test flight awhile later and all systems appeared to be fully functional once again.
Lesson learned: no more 3S flight battery for this gal!
UPDATE: 11-03-18
While of a flight yesterday afternoon, primary power suddenly and inexplicably failed; the drone subsequently fell out of the sky 2:40 into the flight. It crashed into the fenced-in back yard of a nearby home; fortunately somebody was home and retrieved my drone and the camera (the camera detached upon impact but thankfully didn't bounce away!).
The only visible damage was that the starboard (right) landing sprig snapped off.
The flight that I'll be making later this morning (weather permitting of course) will be made with the camera on the upper surface of the fuselage (instead of on the underside as designed) and without the landing sprigs; the drone may be a bit unstable as a result. Primarily for these two reasons, this flight will be conducted at much lower-than-usual altitude. Having an unexplainable failure of primary power yesterday (the resulting crash destroyed the starboard landing sprig) is also good reason to keep the drone low and close by.
Because the landing sprigs are unsalvageable but the drone should still fly, the " " icon will be appended to its listings on this website immediately, denoting partial product failure but the product can still do its intended job -- in this case, fly.
UPDATE: 11-09-18
While out flying to capture a gorgeous sunset, the drone inexplicably fell out of the sky and was heavily damaged -- the damage was too extensive for me to repair. Therefore, the always-dreadful, "" icon will have to be appended to its listings on this website at once. 
UPDATE: 01-02-19
A close family friend has apparently been able to successfully repair this drone!!!
The issue was that during the upside-down crash, the pin holding the starboard (right) rear prop had become dislodged, becoming jammed against a
moving part of the motor. Repairing that freed up the motor so now it spools up like the other three.
A test flight will be conducted today, weather permitting of course.
UPDATE: 01-15-19
On the eve of my departure from Shelton WA. to Fresno CA. I have given this drone to the family friend who repaired it in the first place.
Therefore, the always dreadful, " " icon will be appended to its listings on my website to denote the fact that I no longer have the product in my custody.
* The motors are in fact brushed, not brushless like some of the online advertising spiel would have you believe.
MANUFACTURER: Global Drone
PRODUCT TYPE: Medium/large-sized R/C GPS quadcopter (drone) w/inbuilt camera
LAMP TYPE: LED
No. OF LAMPS: 9 (1 red in remote, 1 red & 1 green in charger, 2 red, 3 green, and 1 blue in drone itself)
BEAM TYPE: N/A
SWITCH TYPE: Pushbutton on/off on drone; slide switch on/off on radio
CASE MATERIAL: Plastic
BEZEL: N/A
BATTERY: 4x AA cells for remote; 7.4V 2,000mAh Li:PO battery for drone
CURRENT CONSUMPTION: Unknown/unable to measure
WATER- AND URANATION-RESISTANT: Very light sprinkle-resistance only
SUBMERSIBLE: EIN GROßER RIESIGER GEIST, DER EINEN RIESIGEN PLUMPS NIMMT UND DANN DEN KOPF UNROT NEIN VERLÄSST!!! 
ACCESSORIES: USB charging dongle w/ cable, flight battery, remote controller, 4x blade guards, 2x landing sprigs, 2 sm. bag of screws, small Phillips screwdriver
SIZE: 625mm sq. x 195mm T
WEIGHT: 1.980kg (~4.4 pounds) (incl. battery)
COUNTRY OF MANUFACTURE: China
WARRANTY: Unknown/not atated
PRODUCT RATING:

Global Drone X183 (X6 Follower) WiFi FPV GPS Drone *
Do you manufacture or sell an LED flashlight, task light, utility light, or module of some kind?
Want to see it tested by a real person, under real working conditions? Do you then want to see how your light did? If you have a sample available for this type of
real-world, real-time testing, please contact me at bdf1111@yahoo.com.
Please visit this web page for contact information.
Unsolicited flashlights, LEDs, and other products appearing in the mail are welcome, and it will automatically be assumed that you sent it in order to have it tested and evaluated for this site.
Be sure to include contact info or your company website's URL so visitors here will know where to purchase your product.
This page is a frame from a website.
If you arrived on this page through an outside link,you can get the "full meal deal" by clicking here.